Interior
Steering wheel stitch-on leather wrap
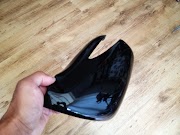
I purchased a stitch-on leather wrap for my steering wheel. I purchased my leather wrap from AliExpress directly from China. Cost was $26 with FREE delivery and with a extra $4 off coupon. Making total $22 which converted in GBP to around £17. You can get them as cheap as $12 with free shipping. But most of them are synthetic leather. I went for the slightly more expensive one that said genuine cowhide leather.
The leather feels really good, feels much better than the original leather in my opinion. I went with the perforated option with blue stitching to compliment the ultrasonic exterior blue of my car (The chinese sellers call it with holes option with blue line). As i mentioned above, there are even cheaper ones but this one said it's real cowhide leather and the seller has reassured me that it's real leather. I'm no leather expert and cannot 100% guarantee if it is real leather or not but I'm going on the sellers word and to me it looks better than any real leather 😁😀
I wanted to add an F Emblem at the bottom of the steering wheel to give the re-trim some uniqueness. F emblems small enough for the steering wheel are hard to find and Lexus don't seem to sell them as replacements. So I designed and printed my own in 3D resin. I cut-out a recess in the original steering wheel and used contact adhesive to form this recess shape on the new leather. The result in my opinion is great. I also re-wrapped my steering switch covers in gloss carbon.
The key to a perfect fit is to make sure you stick down the leather and stretch and tightly stitch it together.
Cost for project was £17 for leather, £3 for contact adhesive and about £10 for printing a sheet of F emblem and £0.99 for the carbon wrap. Making the total £30.99
A few tips for those who are going to attempt this mod.
- Make sure the orientation of the leather wrap is in the correct way. There is usually a sticker/label on the inside with chinese writing and a arrow. The arrow is indicating the direction of the front person view.
- The leather will be tight and this has to be in order to get a good finish. Make sure the two edges meet up where the original steering wheel stitching meets. It may be that there may be a few mm gap where the two ends meet, but this is ok as the idea is to tighten this using the stitching.
- I used contact adhesive only on the 6 O'Clock position for the recessed emblem. Everywhere else i used the supplied double-sided tape. Use plenty of tape and do it bit by bit making sure everything is tightly stuck on. Once finished with the stitching, I then used contact adhesive to fold in the edges by the airbag and audio switches.
- Finally, regarding the stitching. There are many guides on how to do the stitching. Some do a double thread and some do single thread. By double thread i mean when you put the thread in the needle, to half it and tigh a knot which creates a double thickness stitching. I personally went with the double thread option as I was after a good density in my stitching colour. Most people seem to skip a notch when stitching too, this seems to be the normal practice. But once again seeing as I was after maximum colour density on the stitching, I didn't skip any notches. This also gave me the ability to make sure it's super tight. When beginning the stitching, I started from underneath and made the thread go through a existing notch underneath a few time and then bought it up through the existing hole and then went through the top of the opposite hole. After that, everything was done on by stitching the existing threads together as described in most instructions. Hope that makes sense make sure you have enough thread to complete the length of he section you are working on. Otherwise you have to continue the stitch from where you left of which is extra work. The kit comes with plenty of thread to do this as a double stitch. I measured and cut out 6 times the length I am stitching of thread. This was a safer option.


1 Comments
Nice work - looks decent, especially for the price paid!
ReplyDelete